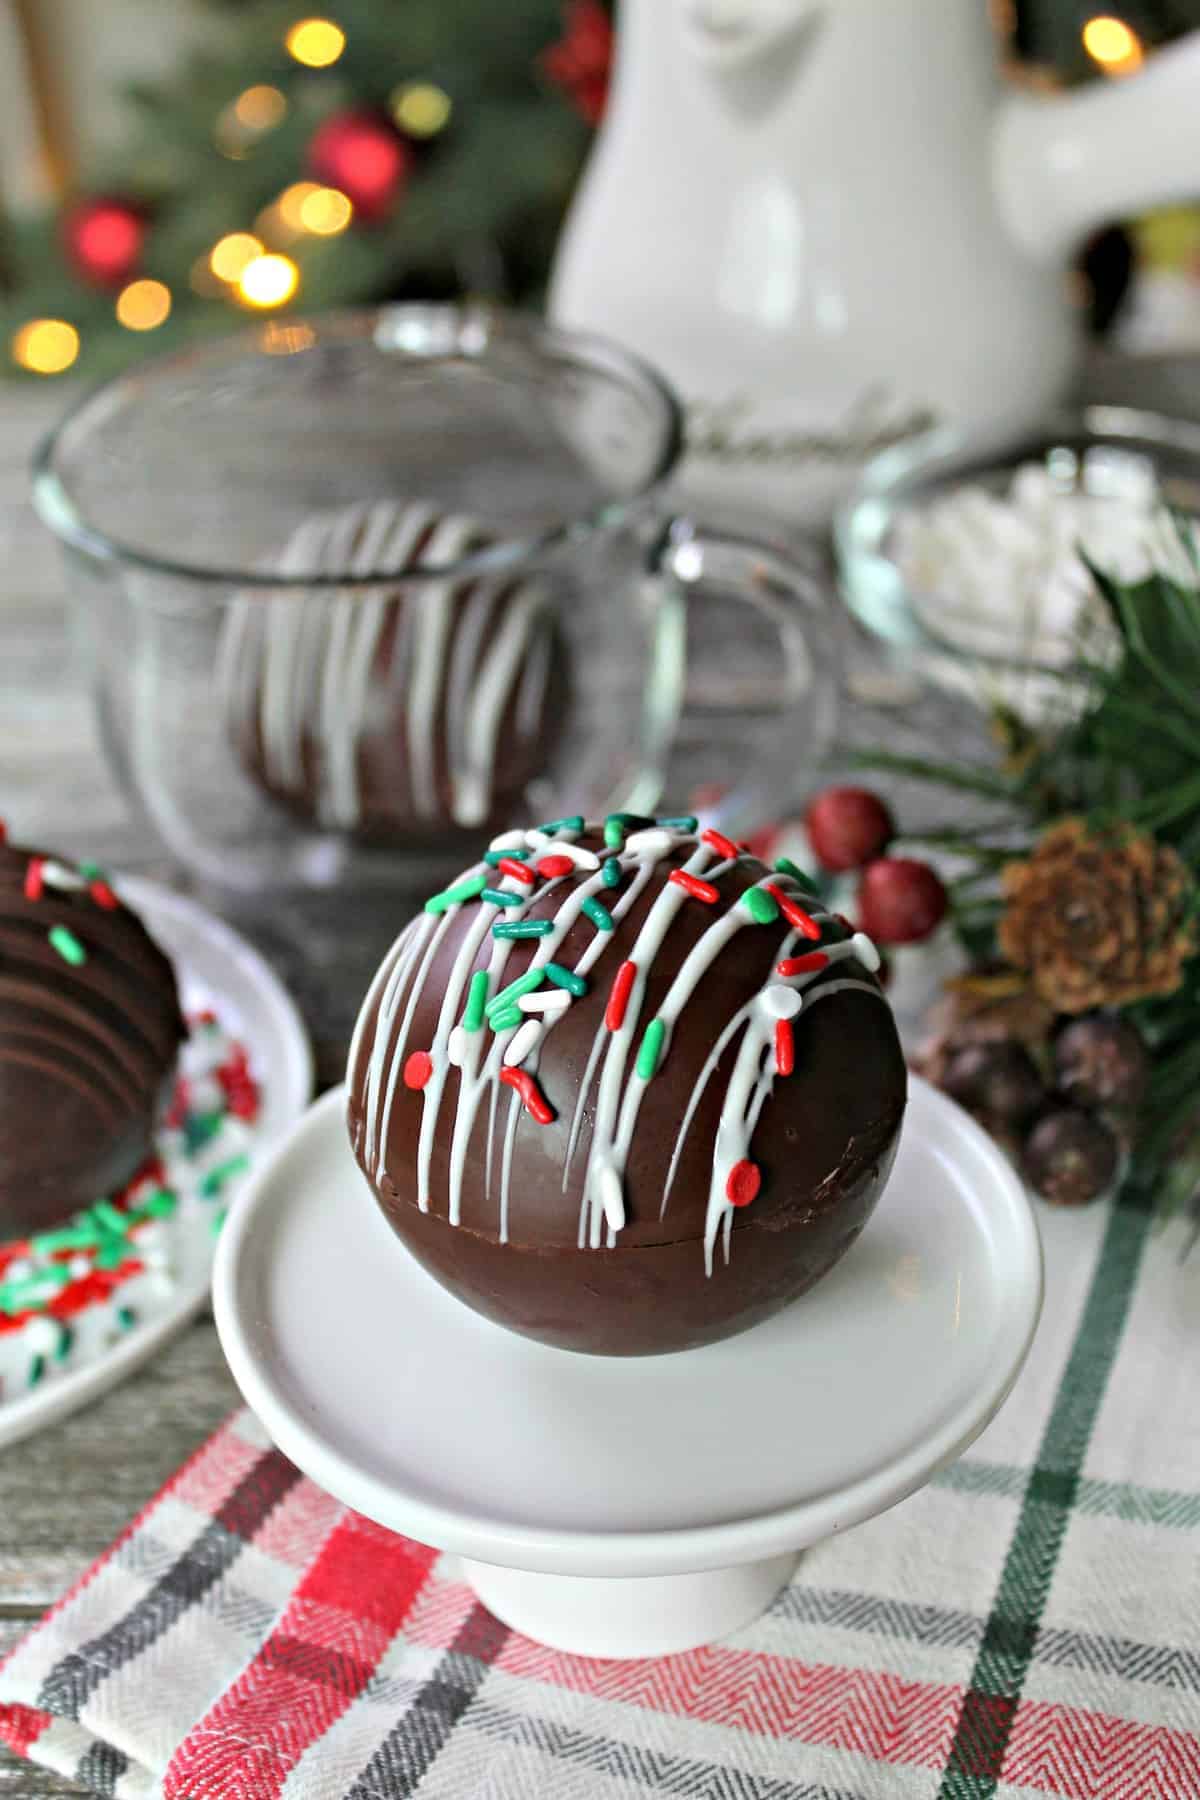
Christmas Hot Cocoa Bombs
Christmas Hot Cocoa Bombs! This trendy way to enjoy hot cocoa is fun for the cold weather months and holiday season.
Servings: 6 bombs
Equipment
- 2.55 inch Semi-Sphere Silicone Mold
- 2 small baking pans
- Parchment paper
- Spoon
Ingredients
- 2 3.5 ounce bars of good quality chocolate, such as Valrhona or good quality chocolate chips dark, milk or white
- 6 tablespoons hot cocoa mix
- 6 teaspoons mini marshmallows or marshmallow bits
Instructions
- Break up the chocolate bar and place in a small bowl. Microwave on high for 15-30 second intervals, pausing to stir each time until fully melted and smooth.
- Prepare a small baking pan by lining with parchment paper. Set aside.
- Place the silicone mold on top of the second (non-lined) baking pan.) Working quickly, fill each cavity with about a tablespoon of melted chocolate.
- Lift the mold and swirl it carefully to make sure that the chocolate coats the entire interior of each sphere all the way to the lip. (See notes for suggestions on how to make this step easier.) Invert the silicone mold to allow the excess chocolate to drip off over the parchment-lined baking pan. If desired, you can place the parchment in the freezer until solid and scrape this chocolate back into the bowl to use later.
- Set the coated mold on back on the non-lined pan and place in the freezer for about 5 minutes.
- When the chocolate has set, remove from the freezer and repeat the process adding another tablespoon of chocolate into each semi-sphere, swirling to coat as much as possible all the way up to the lip. (You will need to do this quickly as the melted chocolate will begin to harden once it touches the cold, set chocolate in the mold.) Return to the freezer for another 5 minutes.
- Once set, remove the mold from the freezer. Run your hands under very cold water or hold a few pieces of ice for a few seconds to make your fingers cold; dry hands. Carefully remove each half sphere from the mold, placing them gently on the baking pan.
- Fill 3 of the molds with 1 tablespoon of hot cocoa mix and 1 teaspoon of mini marshmallows. Add additional fillings if desired.
- Heat a small plate in the microwave for about 15-20 seconds or until warm to the touch.
- Chill hands again and dry. Carefully lift a chocolate sphere (these will be the "lids") and place gently on the warm plate for just a second or two until the bottom becomes melty. Quickly place on top of a cocoa-filled sphere half. Repeat with remaining sphere halves. You will have 3 spheres. See notes for tips on how to fully seal the edges if you have gaps.
- Repeat this process a second time to create 3 more hot chocolate bombs.
- Decorate as desired with a chocolate drizzle, sprinkles, etc.
- Gently transfer to an airtight container and keep refrigerated until ready to package or use.
Notes
- If you are using chocolate chips: Chocolate chips tend to be thick and gooey when melted, so you may not need to coat the molds a second time. Simply pour a tablespoon of melted chocolate into each semi-sphere and smooth it up the sides of the mold (all the way to the rim) with the back of your tablespoon measure, then place in freezer to set.
- If you are using bar chocolate: As bar chocolate tends to be thinner and more runny, you will need to repeat the coating process after the first coat sets in order to thicken the chocolate sphere.
- To fully seal the bombs: Place a metal spoon in a mug of boiling water (or run under hot water) for 5 seconds. Dry spoon. Gently run the back of the spoon along the seam of each hot chocolate bomb -- you will only need to touch the warm spoon to the chocolate for a split second. This will help to melt the chocolate and "weld" each bomb closed. Gently wipe away any excess or dripping chocolate with your finger. You may have small gaps where the shells do not sit flush; dab a bit of extra melted chocolate on these and smooth to patch. Refrigerate until ready to decorate.