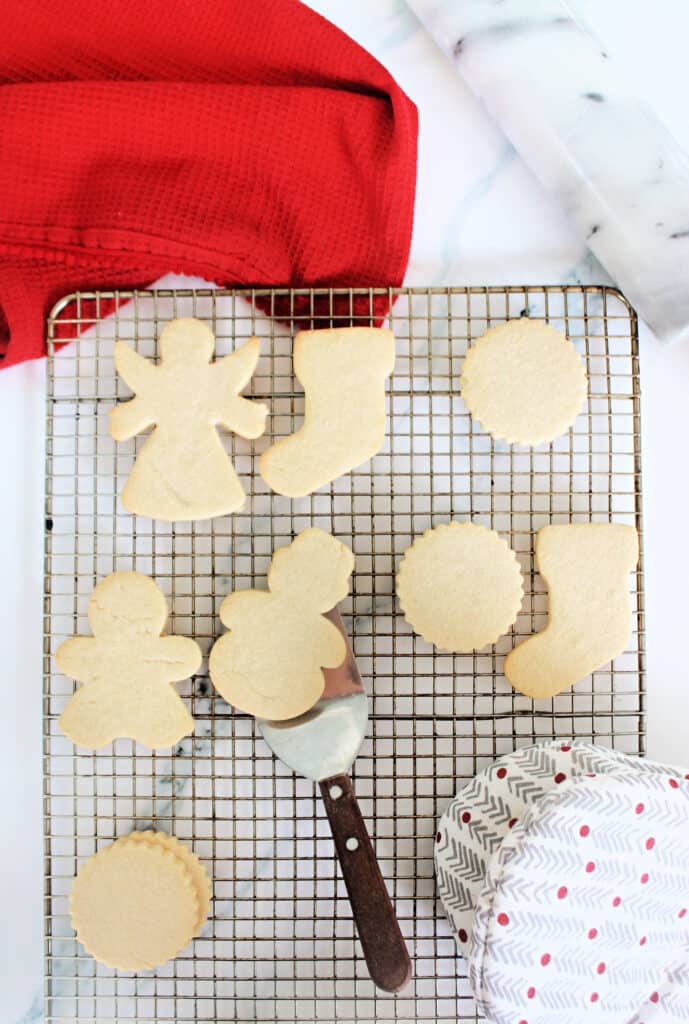
No Spread Sugar Cookies! This cut-out sugar cookie recipe will become a fast favorite! It is easy to work with, requires no chilling and bakes up without losing its shape. A perfect cookie for decorating!
This post may contain affiliate links, which means that, at no extra cost to you, I may earn a small commission if you click a link and purchase an item I’ve recommended. Thanks for your support in running this blog!
Have you ever tried to make homemade cut-out sugar cookies only to find that they lose their beautiful shapes while baking in the oven? So disappointing!
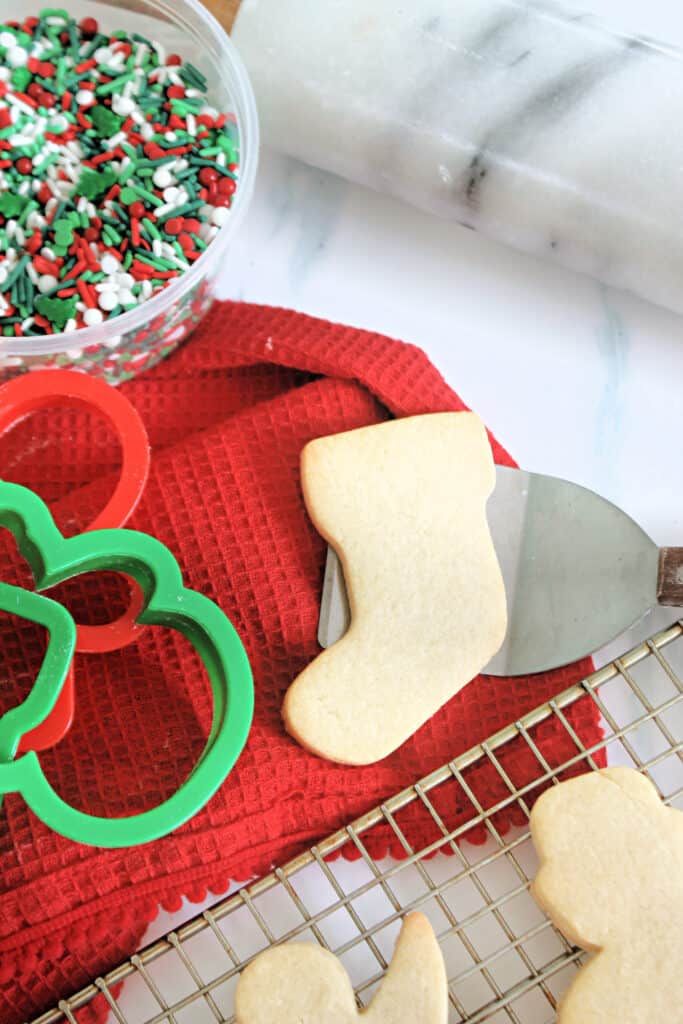
My foolproof, no spread sugar cookies are the perfect roll-out cookies for decorating because they don't require chilling and they keep their neat edges when baked! No more sloppy snowflake cookies or melted mitten shapes; be prepared to get compliments on these gorgeous goodies that are great for holiday baking, or for any occasion year-round.
These no spread sugar cookies are firm, yet tender with a mildly sweet, buttery, vanilla flavor. They can be baked to be more crisp if desired, and there are many variations that can be made out of this simple dough.
Want to try more easy cookie recipes? Check out my Double Chocolate Chip Cookies, Peanut Butter Chocolate Chip Cookies & Mix & Match Pudding Cookies!
This recipe is vegetarian and can be made gluten-free. (See Variations and Substitutions section below.)
Jump to:
Ingredients
One of the best parts about classic sugar cookies is that they require very few ingredients!
- Butter. I use unsalted butter in baking to better control the salt content. If you forget to leave your butter out on the counter to soften (as I often do), try one of these tricks for quickly softening butter.
- Granulated Sugar. White sugar gives these cookies that classic sugar cookie flavor and texture.
- Egg. Just one egg is all you need to help bind the dough and give extra richness.
- Vanilla extract. Vanilla gives depth of flavor. Feel free to experiment with other extracts!
- All-Purpose Flour. Regular, all-purpose flour is used here, but I'm fairly certain one-to-one gluten free flour would work, too, if needed.
- Sea salt. Salt helps balance the sweetness and bring out the flavor.
You'll notice that these sugar cookies do not call for any type of leavening such as baking powder or baking soda. I think that's one of the reasons they do not spread when they bake, since they don't get too puffy and rounded. Regardless, they have a wonderful texture; just firm enough to "snap", but also tender.
Instructions
Preheat the oven to 350°F. Line a large baking pan with parchment paper or a silicone baking mat -- you may need 2 baking pans depending on the shape and size of your cookies and how many you get out of one batch of dough.
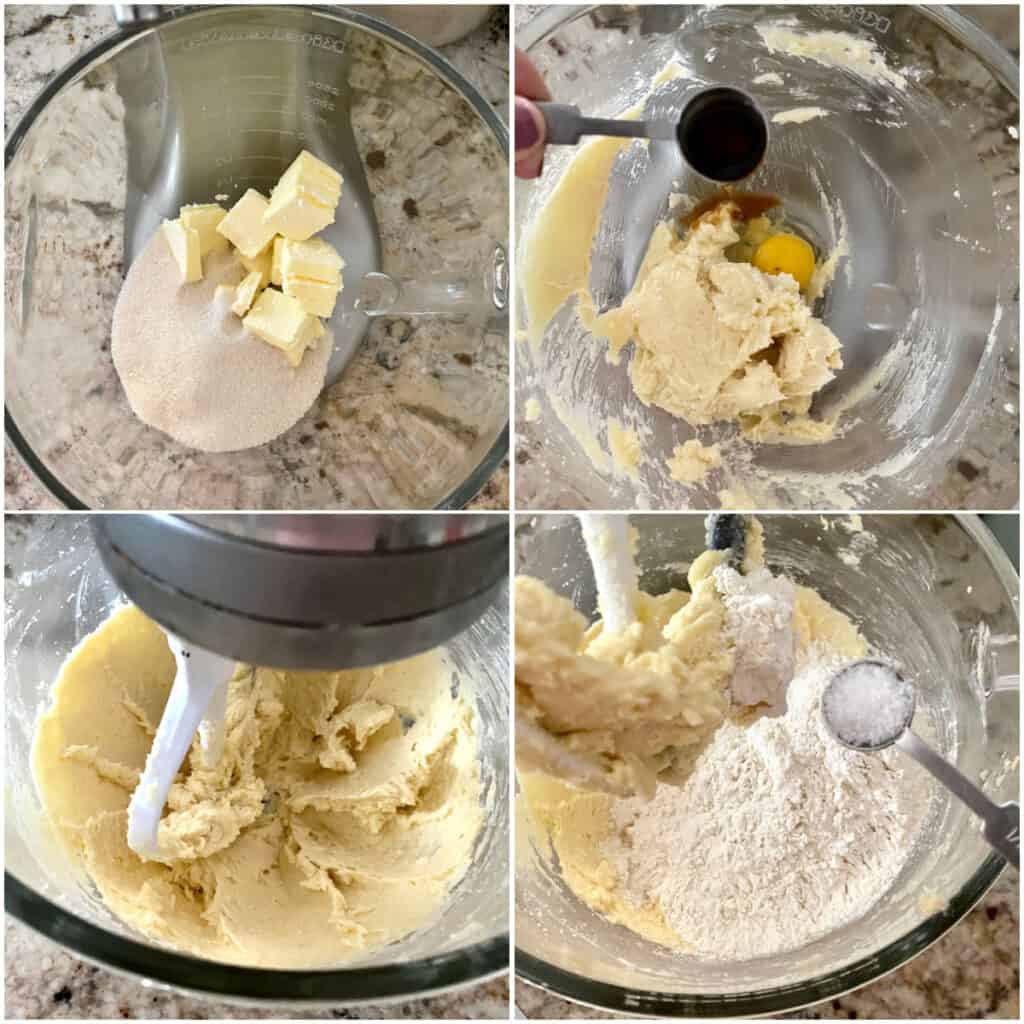
In the bowl of a stand mixer, cream the softened butter and sugar until it is pale and fluffy. Add the egg and vanilla extract; beat until the mixture is well combined.
Meanwhile, sift together flour and salt together in a medium bowl. To be honest, I usually just dump the flour and salt right in to the bowl with the creamed butter and it has never made much of a difference. With the mixer on low speed (we want a White Christmas, not a "white kitchen) add the flour mixture until it just comes together. Do not overmix or your cookies will turn out tough.
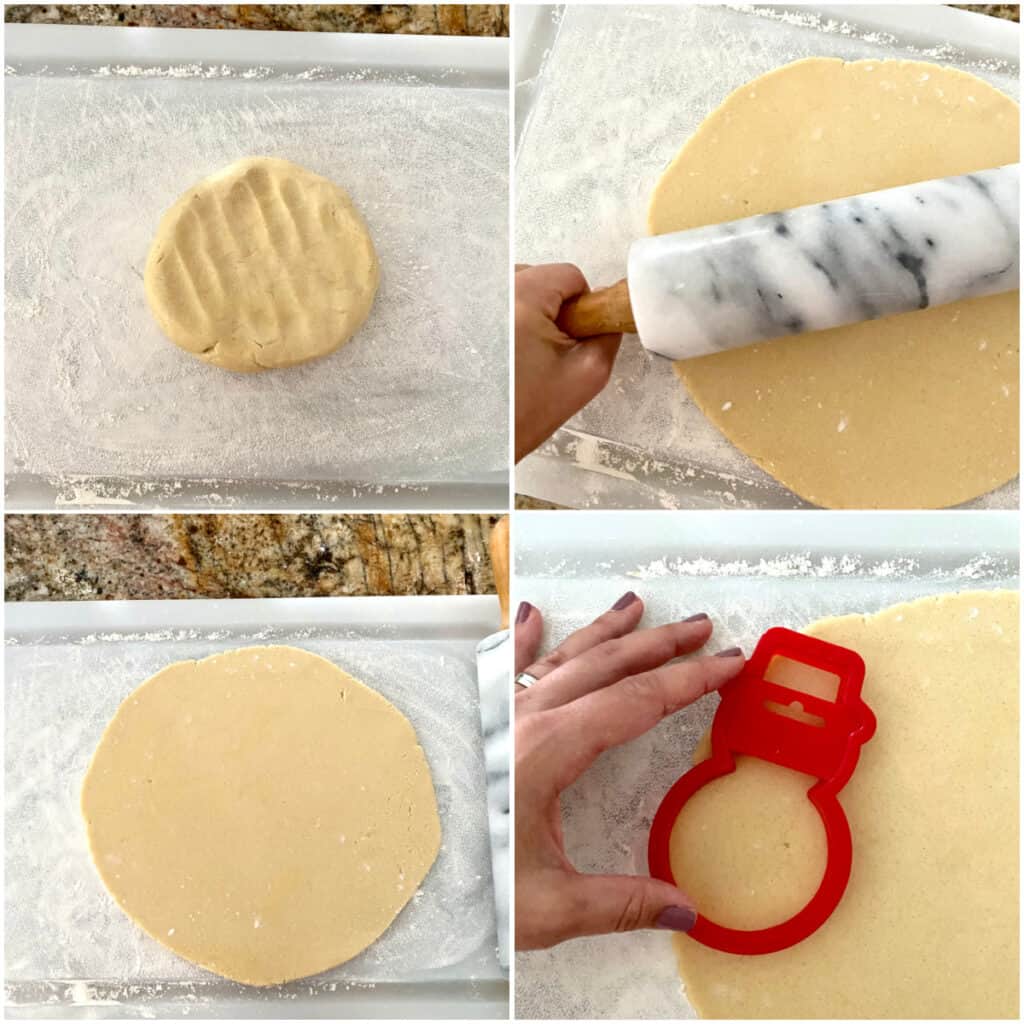
Scoop out about half the cookie dough and place it on a lightly floured surface; this makes the dough easier to manage. I like to place a large piece of parchment on the counter, sprinkle it with a little flour and roll the dough out directly on the parchment because 1. Less sticking occurs, and 2. It is easier to remove the cookie shapes once you're done cutting them out.
Tip: Sometimes, instead of moving my sugar cookie cutouts onto a lined baking pan, I simply remove the excess scraps of dough from the parchment as I cut out the shapes, arrange the cookies so that there's a bit of room between them, and move the entire piece of parchment onto a baking pan so that I don't have to lift my cookies once they're cut.
Using a flour-dusted rolling pin, roll out the dough to desired thickness -- I like to make my cut-outs about ¼ inch thick.
Note: Thicker cookies come out a bit softer and chewier, while thinner cookies brown faster and are on the crunchier side. If you do decide to roll them out thinner or thicker, be sure to adjust the bake time or keep an eye on the cookies so that they don't burn or under-bake.
Use desired cookie cutters to cut out shapes. (The shape and size of the cookie cutters you decide to use will obviously affect the yield.) Using a spatula or cookie spatula, carefully lift the cookie shapes onto the prepared baking pan.
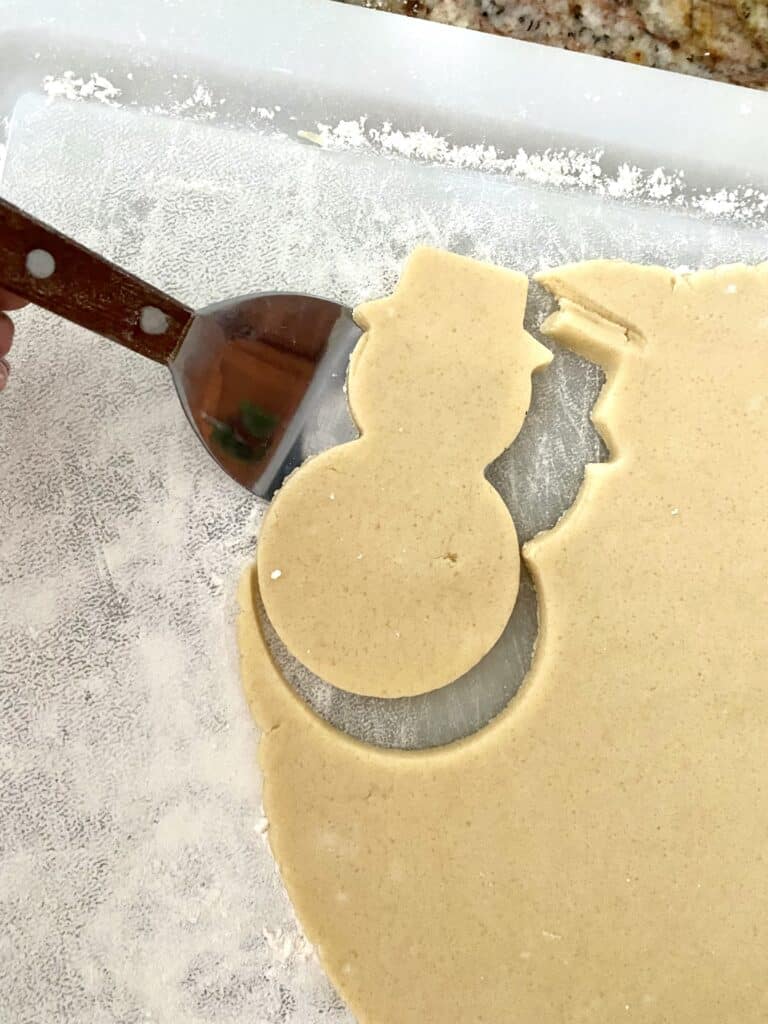
Scraps may be combined and re-rolled if desired, but be aware that the more you handle and roll the dough, the more tougher the cookies will be once baked. (So be gentle and try to cut out your shapes efficiently so that you can maximize the dough the first time you roll it out.)
Bake the cookies for 9 to 11 minutes, or until the cookies are just set and the bottom edges are lightly golden.
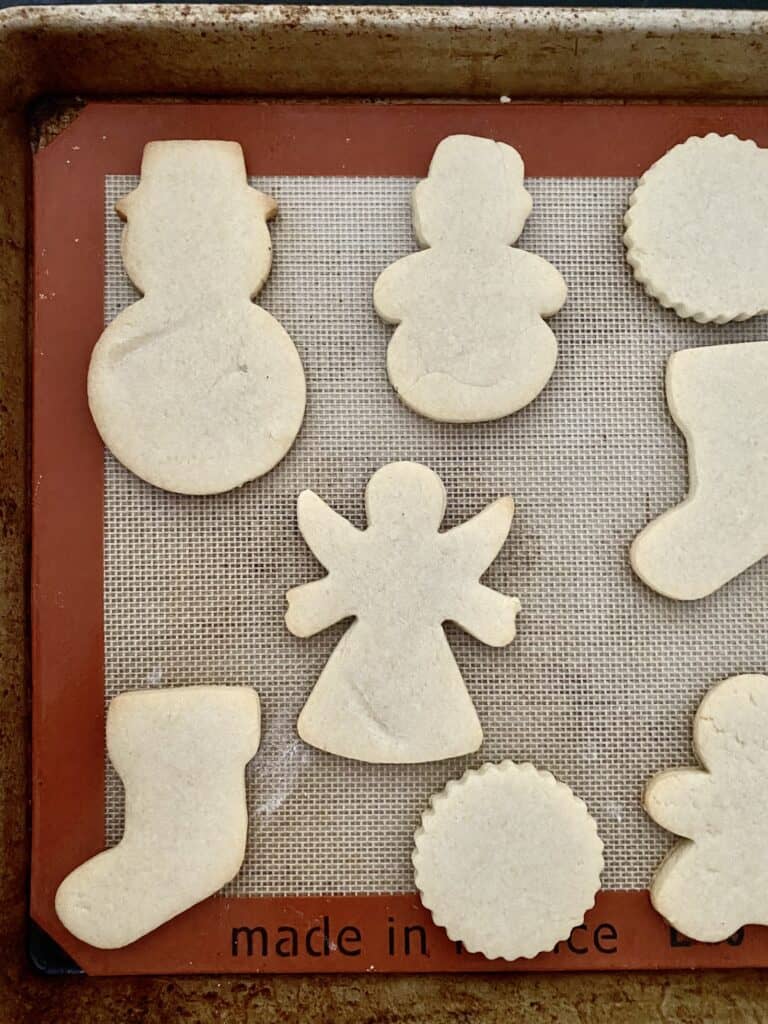
Remove the pan from the oven and allow the cookies to cool while still on the pan, about 5-7 minutes. They will come out of the oven soft, but will harden and become easier to move and handle as they cool.
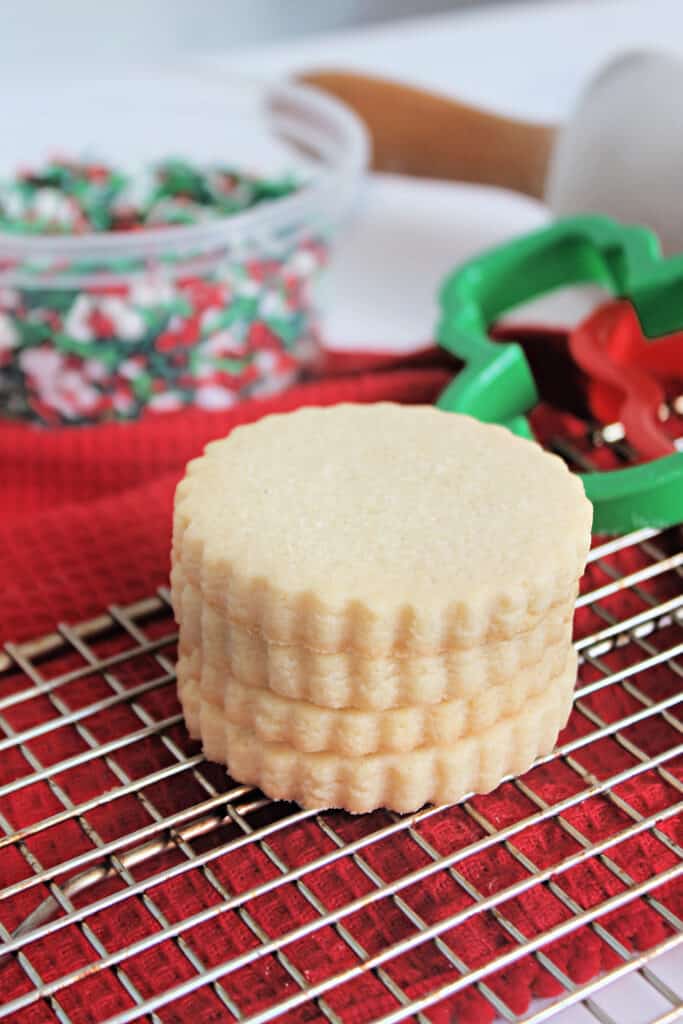
Once easy to handle, place the cookies on a cooling rack to cool completely before decorating.
FAQ's
For starters, use this recipe! 😉 The best way to have cut-outs keep their shape is to start with a good recipe. It is also important that your butter is soft enough for creaming, but not melted or too warm as this will make the dough too soft and increases the likelihood of spreading while baking. If the dough is too soft, then you may need to refrigerate it for 10-15 minutes or until it is more firm.
Make sure the cookie shapes have a few inches between them on the baking pan to let the hot air circulate around them properly while they bake.
Yes! They can be frozen both as dough and after baking. To freeze cut-out sugar cookie dough, make the dough as directed, then divide the dough and form two flattened discs. Wrap each disk well in plastic wrap, then place them in an air-tight, freezer-safe container or a zip-top freezer bag for up to 4 months. When you're ready to bake, thaw them in the fridge overnight or on the countertop until thawed, then roll to desired thickness and cut out shapes as usual.
Baked cut-out cookies are best stored undecorated in an air-tight, freezer-safe container or a zip-top freezer bag for up to three months. Thaw before serving or decorating.
Undecorated, cut-out sugar cookies placed in an air-tight container can stay fresh for up to 3 weeks when stored in a cool, dry place.
Rolling cookie dough to about ¼ inch thickness makes them thick enough to be sturdy but thin enough that they don't under-bake. You can make them thicker or thinner if desired but will likely need to adjust the bake time (2-3 more minutes for thicker cookies, 1-2 less minutes for thinner cookies.)
Tips for Making No Spread Sugar Cookies
These are truly the easiest sugar cookies I've ever made, and they tend to bake up perfectly for me every single time. I'd go so far as to call them "foolproof"! With baking, however, following these tips can ensure the best result:
- Use good-quality ingredients. In recipes that use few ingredients such as sugar cookies, the quality makes all the difference!
- Allow cold ingredients to come to room temperature. You don't want the butter to be too soft or melted because that will change the texture of the cookies, but it should be soft enough to easily cream together with the sugar. Eggs should also be added at room temperature to keep the mixture soft and pliable.
- Measure flour carefully. The best method is to scoop the flour into a measuring cup using a spoon and then level it off with the back of a butter knife or other straight surface. This method ensures that you don't pack too much flour into the measuring cup, which can result in dry cookies.
- Try not to over-mix or over-handle the dough. Doing so will activate the gluten in the flour, which can result in cookies with a tough texture. I recommend mixing the ingredients just until everything is incorporated (no streaks of flour left). I try also try to be strategic about cutting out my shapes so that I can maximize the first roll out of the dough, resulting in less re-rolling of scraps.
- If your house is very warm and the cookie dough is hard to handle or too soft, you may want to chill the cookies before baking. As I mentioned, I've never had these spread, but I also try to work quickly and put them in the oven as soon as they're cut out.
- Do not grease your cookie sheet. This can cause spreading or over-browning on the bottoms. It's best to use a sheet of parchment paper or a silicone baking mat.
- Be careful not to over-bake. There's nothing wrong with a crunchy cookie, but these are best when they're just set with very light golden brown bottoms and edges.

Variations & Substitutions
This recipe makes a fantastic base recipe for tons of cut-out cookie variations. Here are a few ideas you might want to try:
- Try using other extracts such as almond, peppermint or coconut. (I'd reduce the amount to ½ teaspoon.)
- Add ½ cup of mini chocolate chips to the dough.
- Mix some lemon or orange zest into the butter mixture to give them a citrusy twist.
- Add dried fruit such as finely chopped dried cranberries or apricots.
- Stir in some nonpareils or sprinkles for a colorful surprise.
- Add a teaspoon of cinnamon, pumpkin spice or a combination of your favorite spices to the flour for a lightly spiced cut-out cookie.
Diet Specific Substitutions
- Gluten-Free: Use your favorite one-to-one gluten free flour in place of regular flour.
No Spread Sugar Cookies
Ingredients
- 1 cup butter (2 sticks, 16 tablespoons) softened to room temperature
- 1 cup granulated sugar
- 1 egg
- 1 teaspoon vanilla extract
- 3 cups all-purpose flour
- ½ teaspoon salt
Instructions
- Preheat the oven to 350°F. Line a large baking pan with parchment paper or a silicone baking mat. Set aside.
- In the bowl of a stand mixer, cream butter and sugar until pale and fluffy. Add egg, vanilla extract; beat until well combined.
- Meanwhile, sift together flour and salt together in a medium bowl, . With the mixer on low speed, add flour mixture until it just comes together. Do not overmix.
- Divide the cookie dough in half. Place one ball of dough on a lightly floured surface; it is best to work on a large piece of parchment paper or a silicone baking mat so that the cut out shapes are easy to move. Using a rolling pin, roll out the dough to desired thickness -- I like to make my cut-outs about ¼ inch thick.
- Use desired cookie cutters to cut out shapes. Using a spatula, carefully lift the cookie shapes onto the prepared baking pan.
- Bake the cookies for 9 to 11 minutes, or until the cookies are just set and the bottom edges are lightly golden.
- Remove the pan from the oven and allow the cookies to cool while still on the pan, about 5-7 minutes. They will come out of the oven soft, but will harden and become easier to move and handle as they cool.
- Once easy to handle, place the cookies on a cooling rack to cool completely before decorating.
Notes
- Flavored Cut Outs: Substitute ½ teaspoon almond, peppermint or coconut extract for vanilla.
- Chocolate Chip Cut Outs: Add ½ cup of mini chocolate chips to the dough.
- Citrus Cut Outs: Add 1 teaspoon lemon or orange zest into the butter mixture to give them a citrusy twist.
- Fruity Cut Outs: dried fruit such as finely chopped dried cranberries or apricots.
- Sprinkle Cut Outs: Stir in some nonpareils or sprinkles for a colorful surprise.
- Spiced Cut Outs: Add a teaspoon of cinnamon, pumpkin spice or a combination of your favorite spices to the flour for a lightly spiced cut out cookie.
- Gluten-Free: Use your favorite one-to-one gluten free flour in place of regular flour.

Maddie says
These are perfect, ingredients are balanced, dough is easy to handle - there is zero spread. Excellent for more intricate shapes!
thekitchenprep says
So glad to hear you loved them, Maddie! Thanks for stopping by!
Gran says
As a quick recipe these are perfect sugar cookies. Will make them again for sure when pressed for time. They didn't spread at all, they are soft and moist, delicious!
thekitchenprep says
They're my favorite! So fast and easy and perfect every time. Glad they turned out the same for you!
Allison says
You definitely need more reviews for your recipe! This is my favorite, and I have used many. The cookies hold shape pretty well, ingredients are proportionate to each other. Also I do not like to use baking powder because I feel it makes cookies spread. Kudos to your recipe
thekitchenprep says
Aw, thank you Allison! I shout from the rooftops at every chance I get that these are THE BEST cut out cookies. They have worked beautifully for me for even very detailed cut outs and they are delicious and versatile if you want to switch out the extracts! Glad you enjoyed them, too!
Olga says
Hi! wondering if you find sifting the flour necessary? (I'm lazy)
thekitchenprep says
Hi Olga! Sifting isn't necessary, but I'd give the dry ingredients a good whisk to make sure everything is incorporated and the flour has no lumps. Happy baking!
Marcy says
I never comment on recipes however I felt it was my duty to in this case.. if you’re here because like me you are looking for a truly no-spread sugar cookie that doesn’t taste like cardboard, THIS IS THE ONE. It tastes exactly like the one I used to use but has zero baking soda = zero spread. Using this forever!! I will note that I did chill the dough just in case and they were cold when they went on the oven.. because of that they took about 14 minutes in my oven. Thank you, this is a game changer for me!!
thekitchenprep says
Oh my goodness, Marcy, I LOVE this review. I feel the same! They taste great, can be rolled thicker for softer cutouts or thinner for crunchier ones, and really stay put and allow for beautiful, elaborate shapes/stamps. I'm so glad to hear these will be a keeper for you! Thanks again for stopping by and sharing your success. Happy Baking!