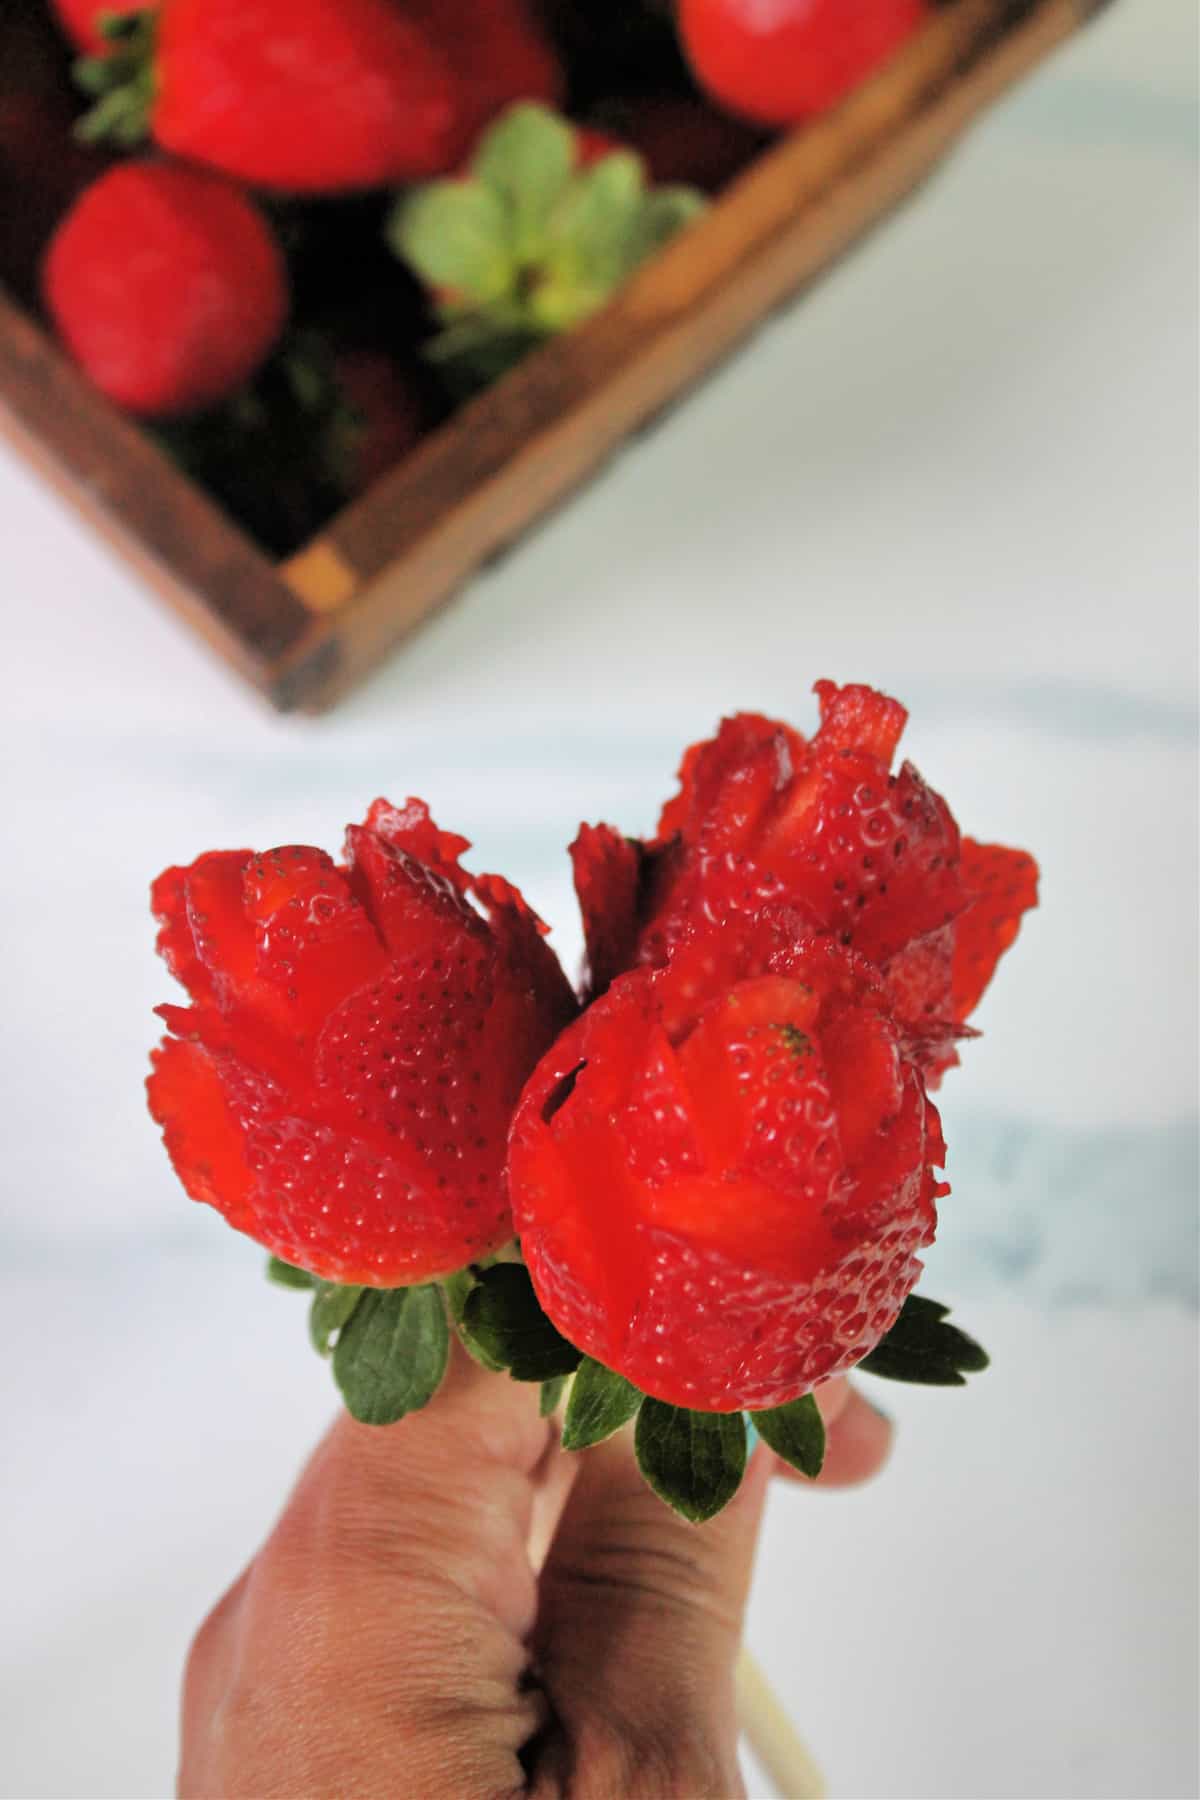
Strawberry Roses! This simple technique yields edible berry "roses" that are perfect for embellishing desserts and cocktails!
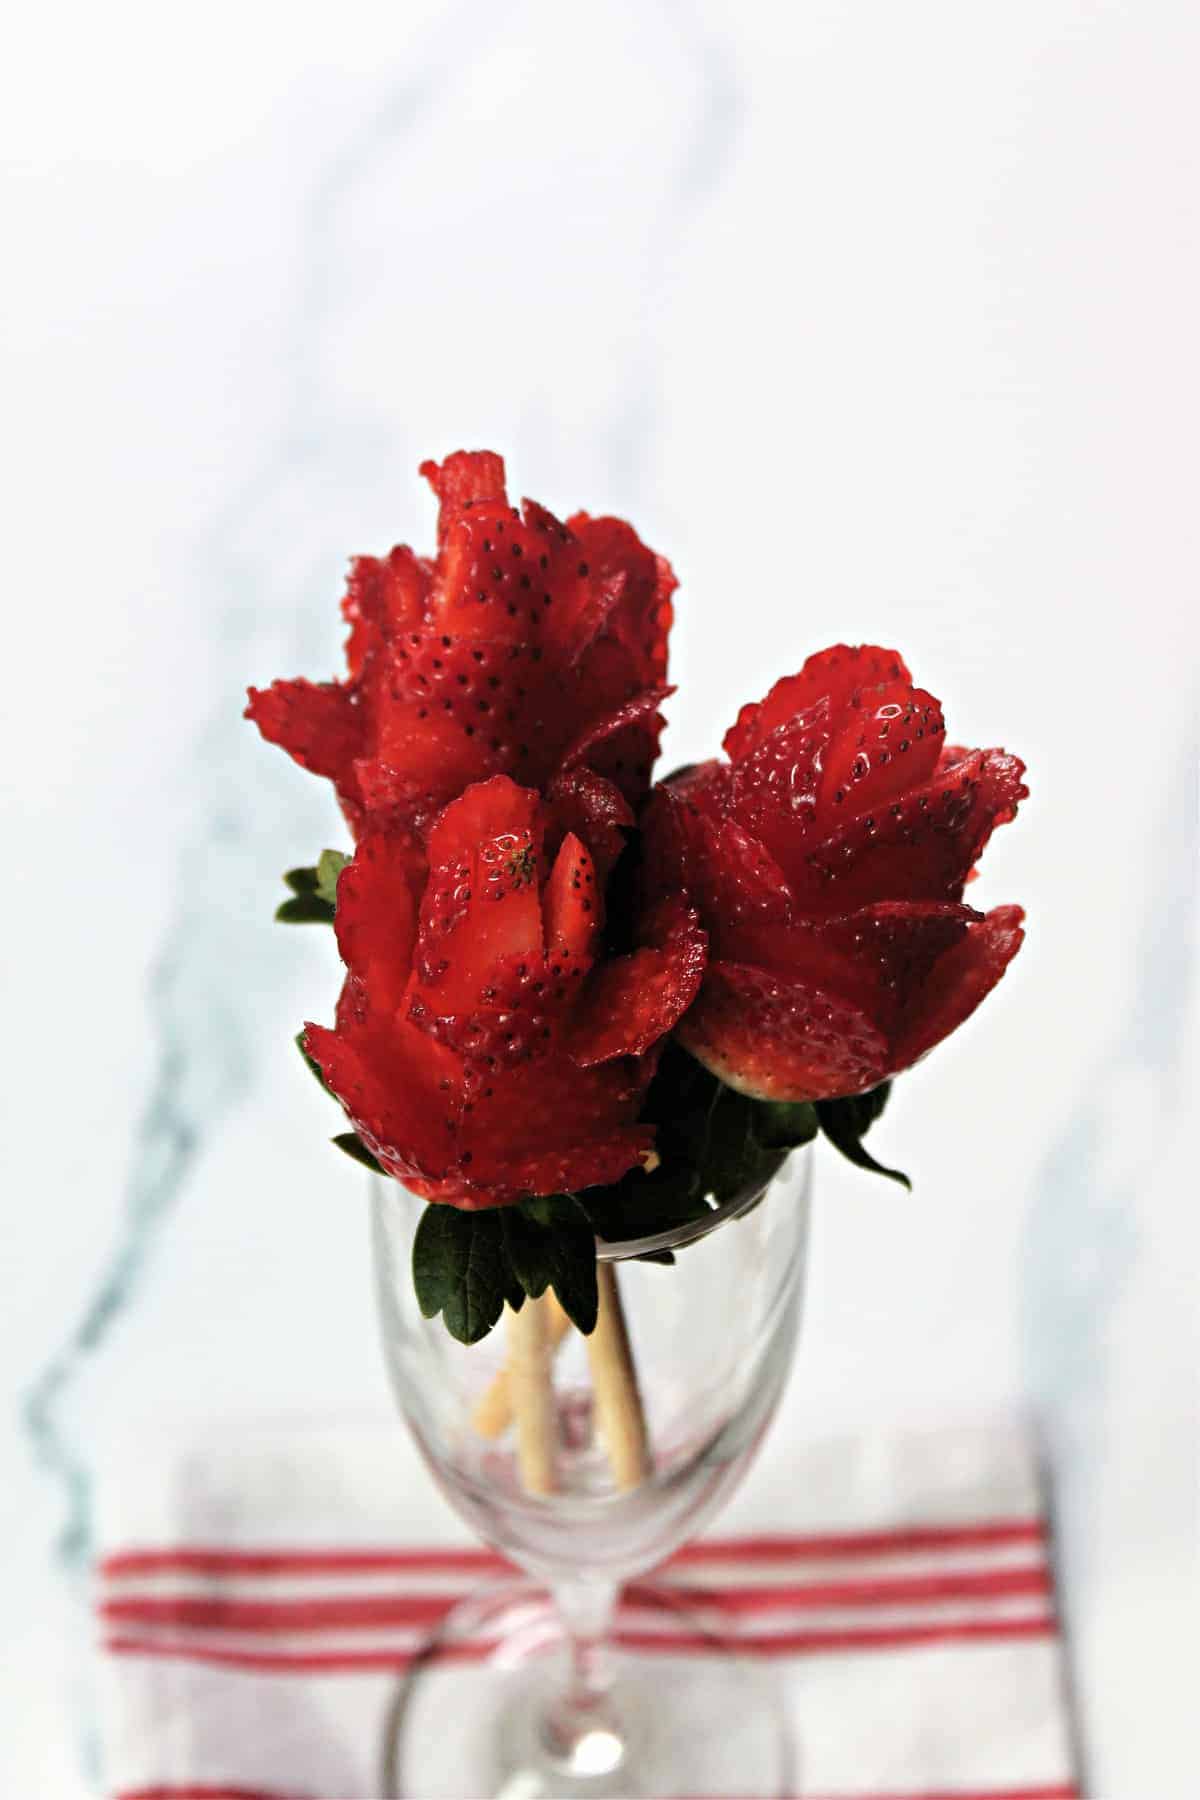
Are you looking for a creative way to serve up luscious strawberries this Valentine's Day? Look no further! Strawberry roses are a simple, yet stunning way to turn a plain piece of fruit into a work of art. The best part? It only takes a few simple tools and a steady hand!
Tools Needed
You'll only need three things to create gorgeous strawberry roses, and they're all easy to find!
- Ripe strawberries. The best strawberries for creating strawberry roses are those that are firm with leafy green stems and a pointy tip.
- A sharp paring knife. This will help make defined cuts easily.
- A wooden skewer or popsicle stick. This will form the "stem" for your roses, making them easy to hold as you cut and make them stable for sticking into desserts or drinks.
Before you get started, you'll want to prep your berries by cleaning them.
How to Clean Strawberries
It's recommended that strawberries are kept dry and refrigerated until just before eating because moisture can cause them to become moldy and go bad faster. But since you'll be slicing these berries into roses, you'll want to give them a quick cleaning before breaking the skin and introducing any bacteria or dirt.
My favorite way to remove dirt and grime from strawberries is to place them in a large bowl with four parts water to one part white vinegar and allow them to soak for about 20 minutes before draining and rinsing them under cold running water. Vinegar is a natural disinfectant, and once rinsed, it won't leave any lingering smell or taste.
Once the strawberries are clean, pat them dry with a clean kitchen towel or paper towels. Now they're ready to cut!
Cutting Strawberry Roses
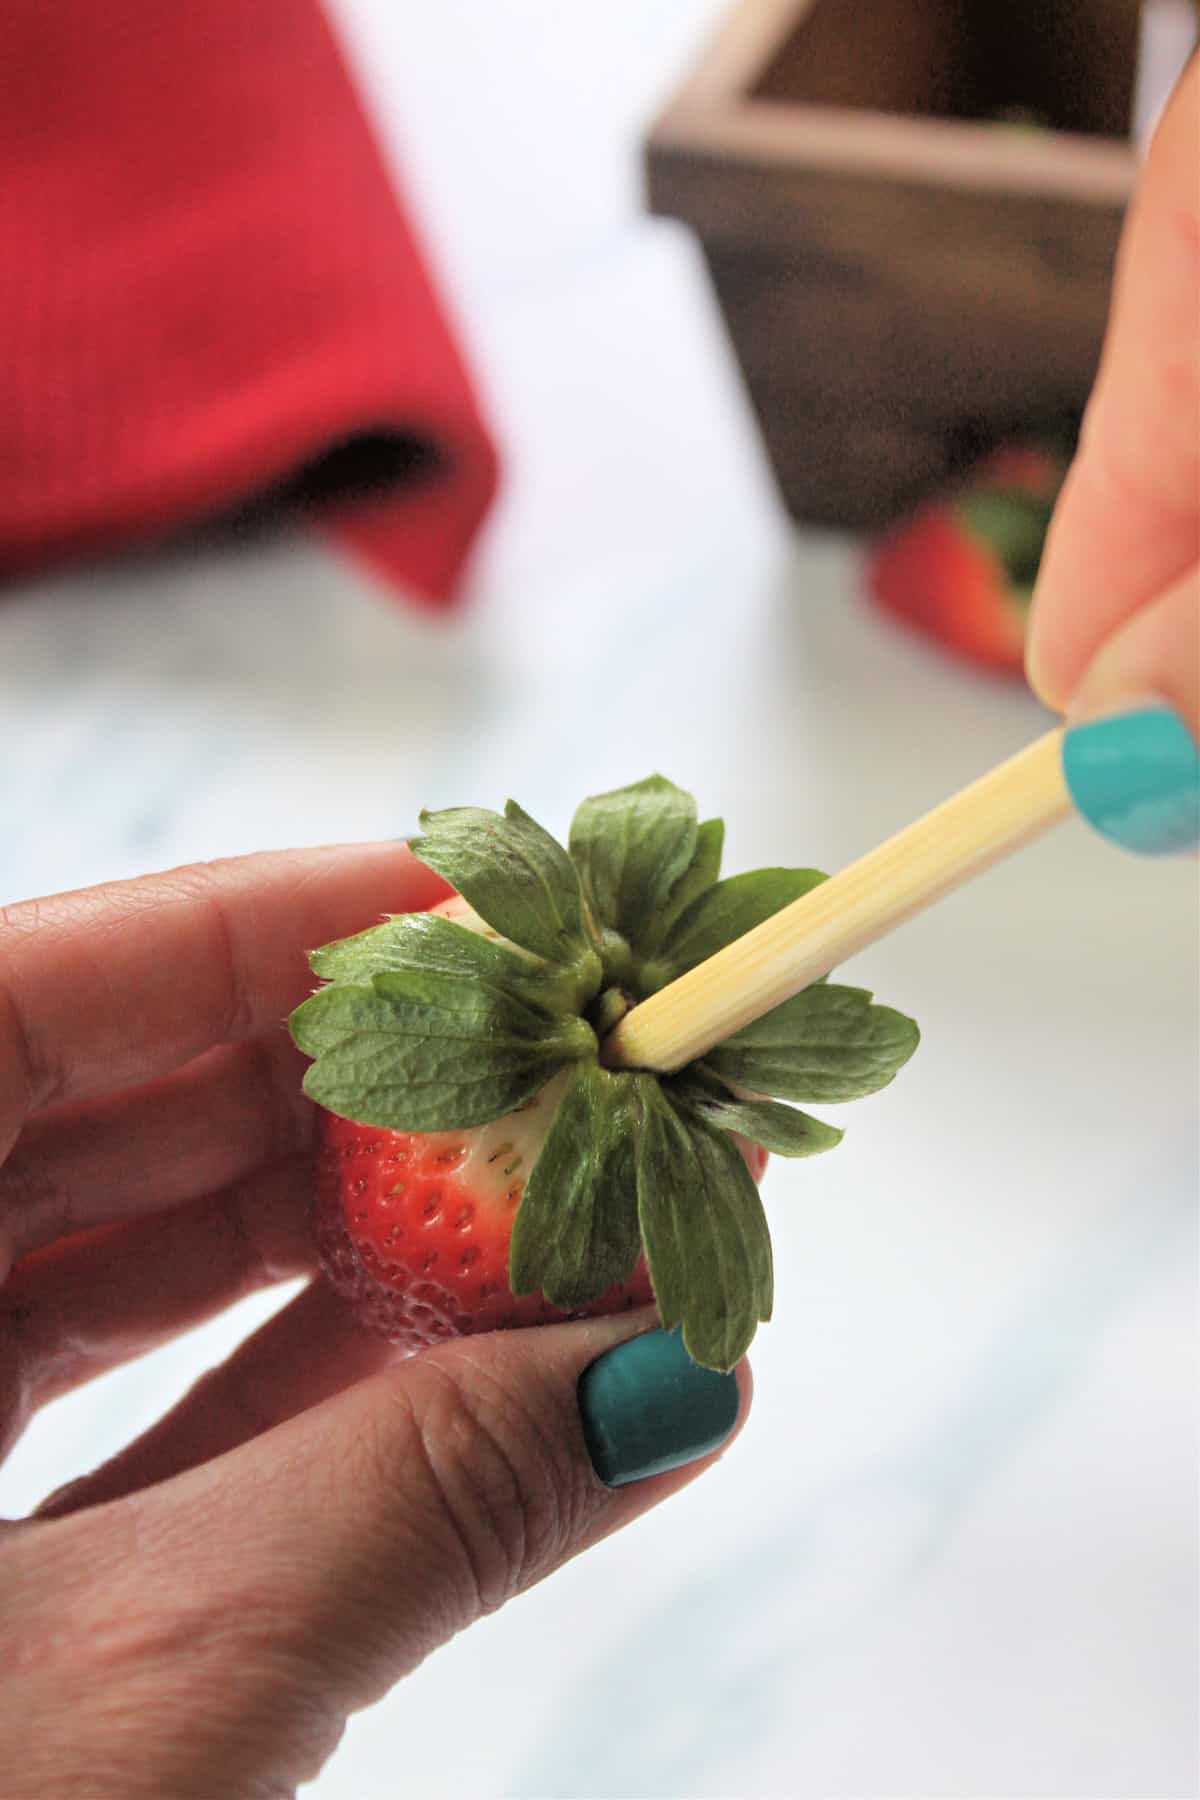
Step 1: Start by inserting the wooden skewer into the leafy end of the strawberry.
Step 2: Beginning at the base of the strawberry, use your paring knife to make thin cuts straight down into the strawberry (not towards the center).
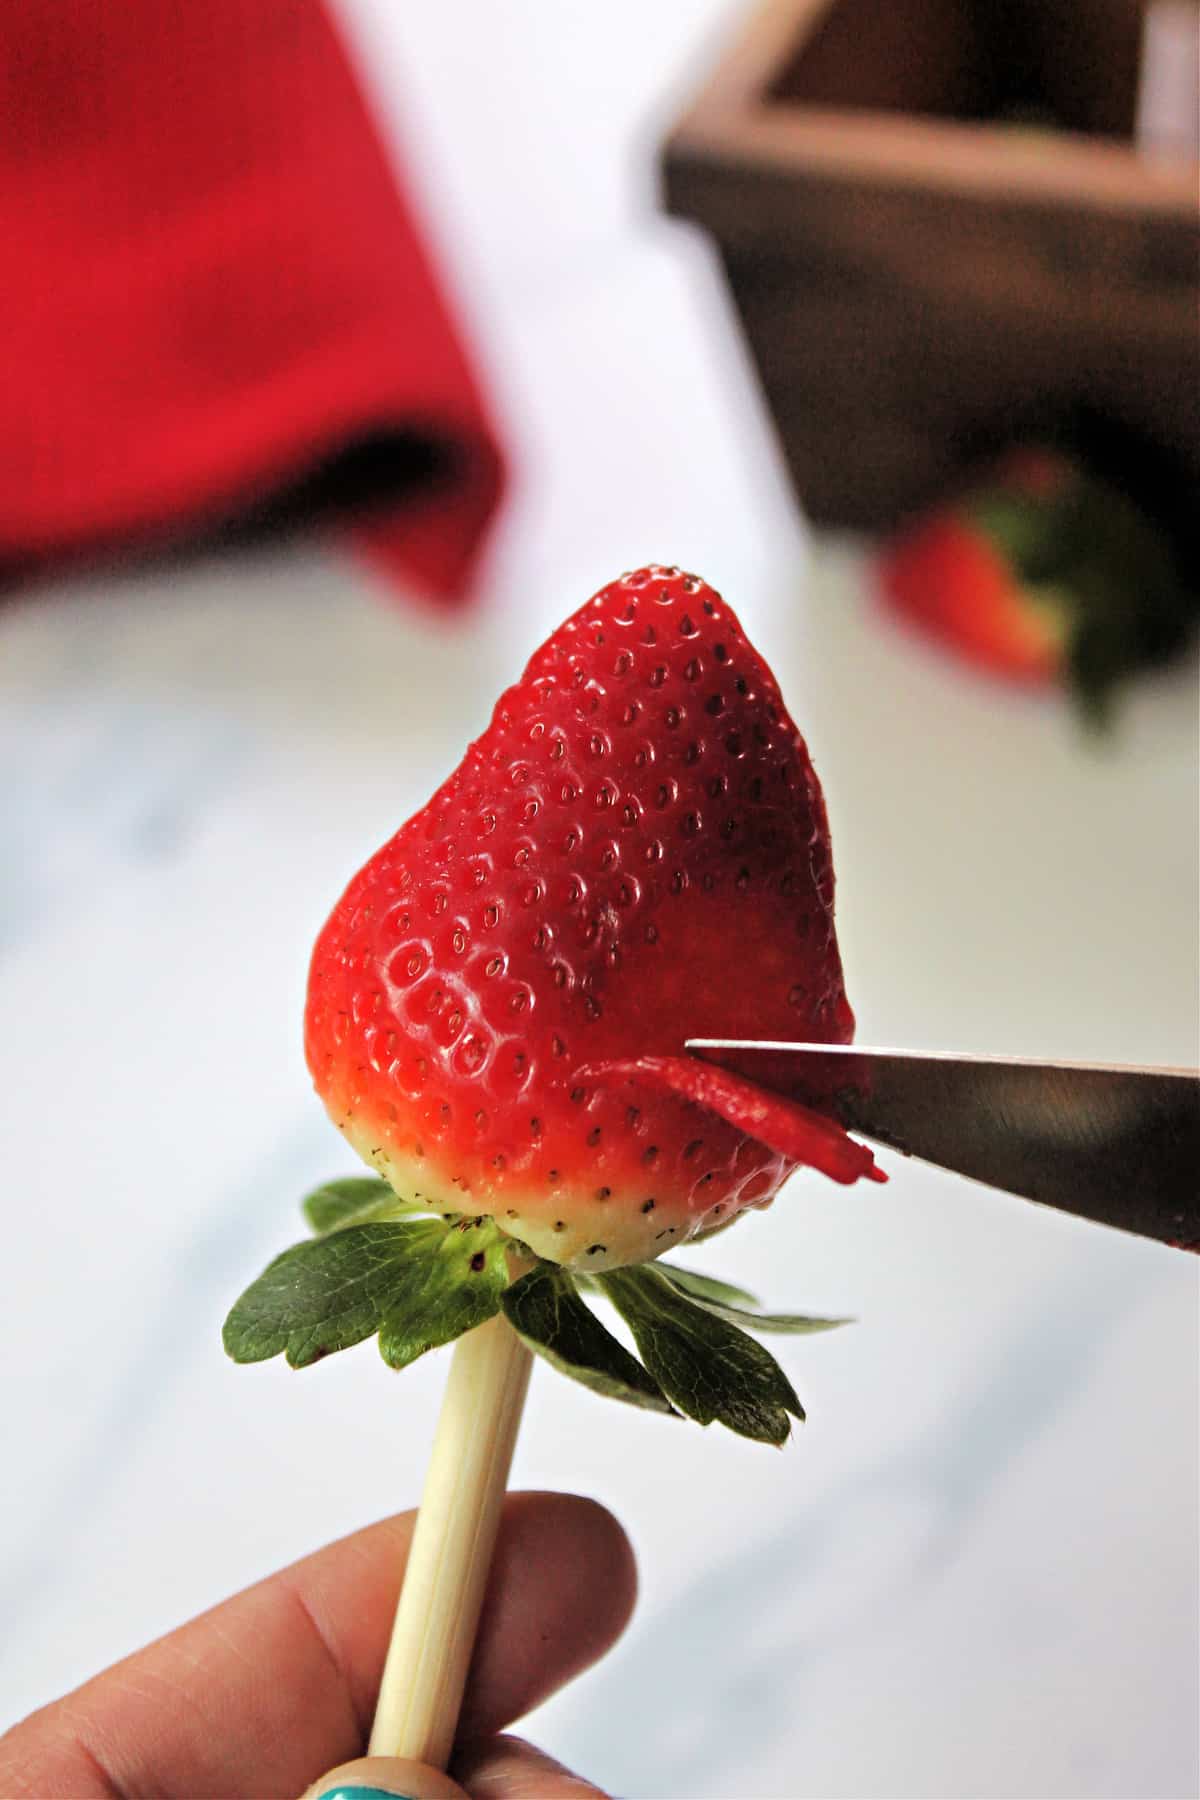
Step 3: Gently curl the slices towards you to create "petals." Repeat this all the way around the strawberry -- you should get 4-5 cuts depending on the size of the berry.
Step 4: When you complete the petals around the base, move up one level to create the next row of petals and repeat the same process - slice and lightly curl toward you. The petals look best if you make the cuts where two of the petals below it meet.
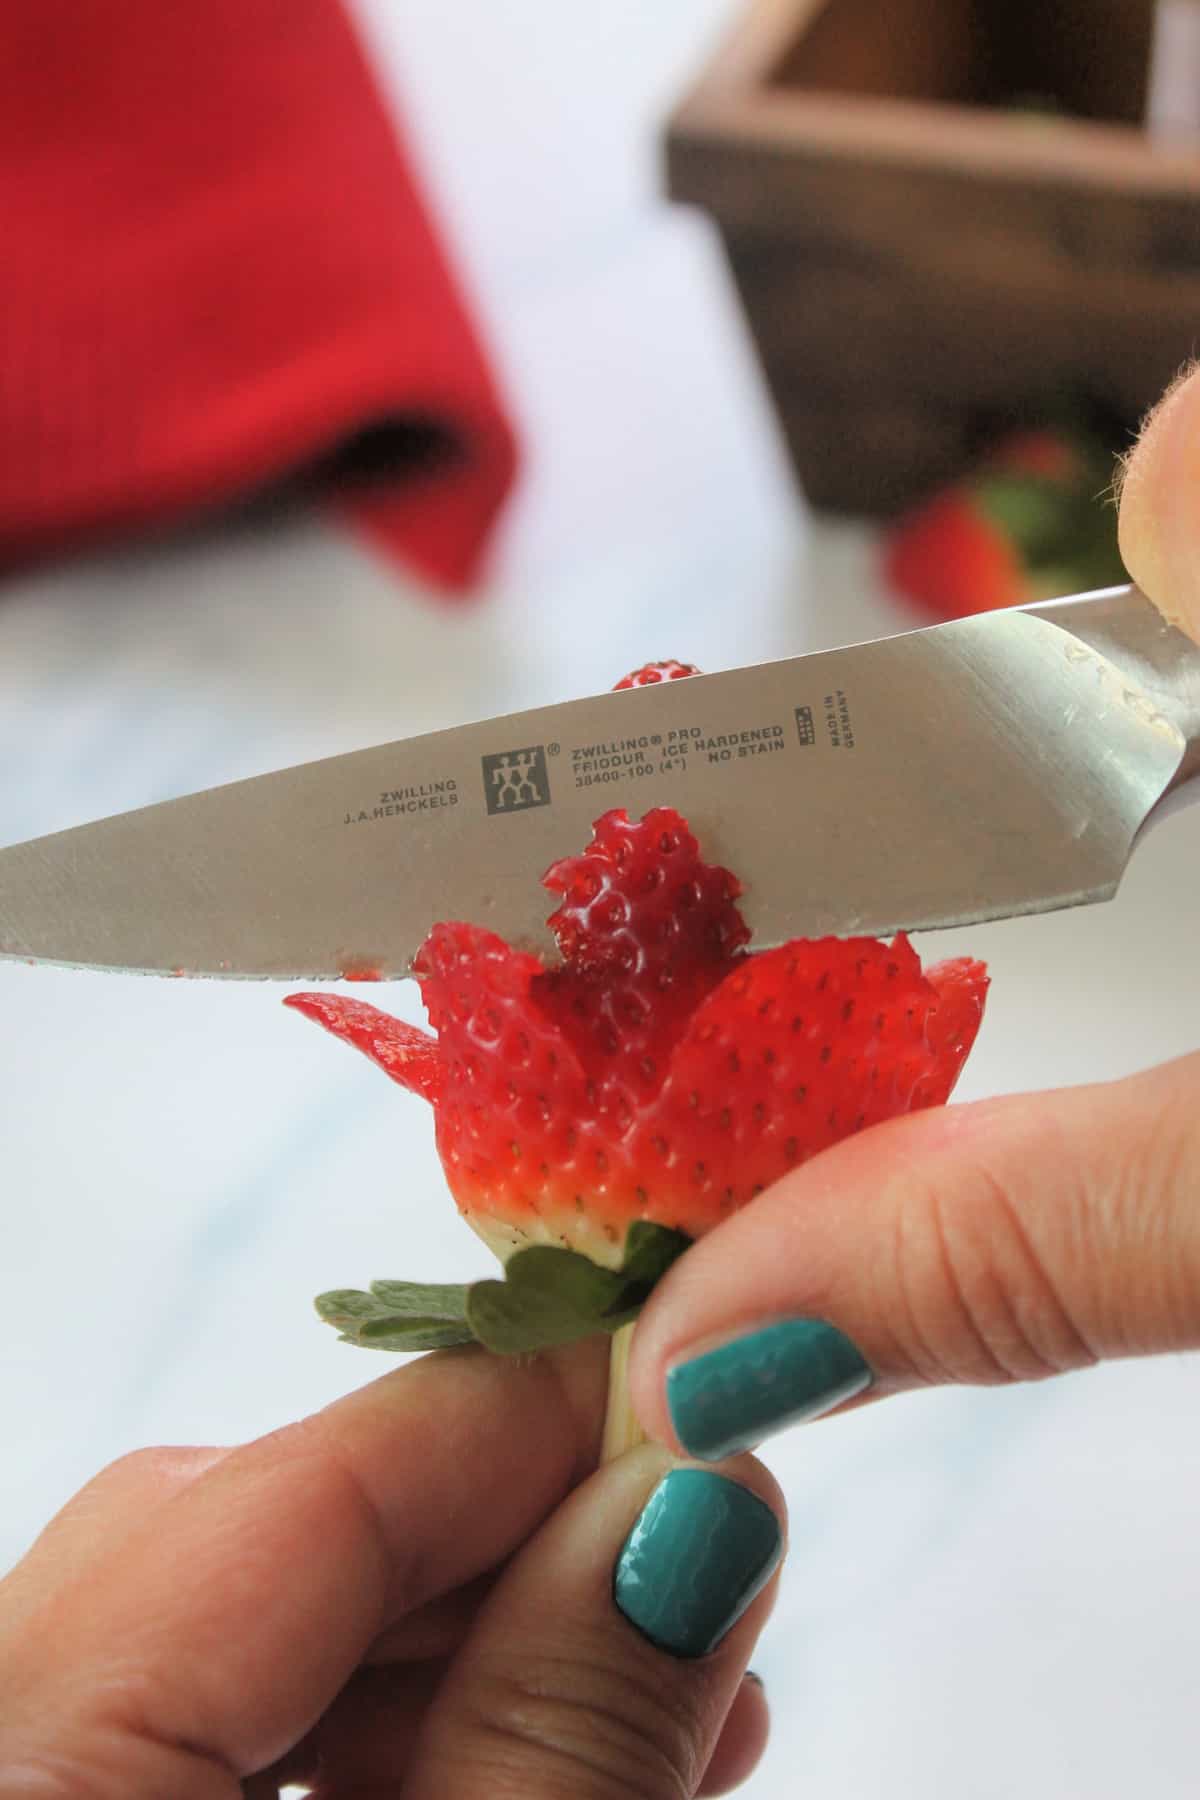
Step 5: Finally, move up another tier and repeat the process once again. When you reach the top of the strawberry, cut a few small slits and gently pull them apart.
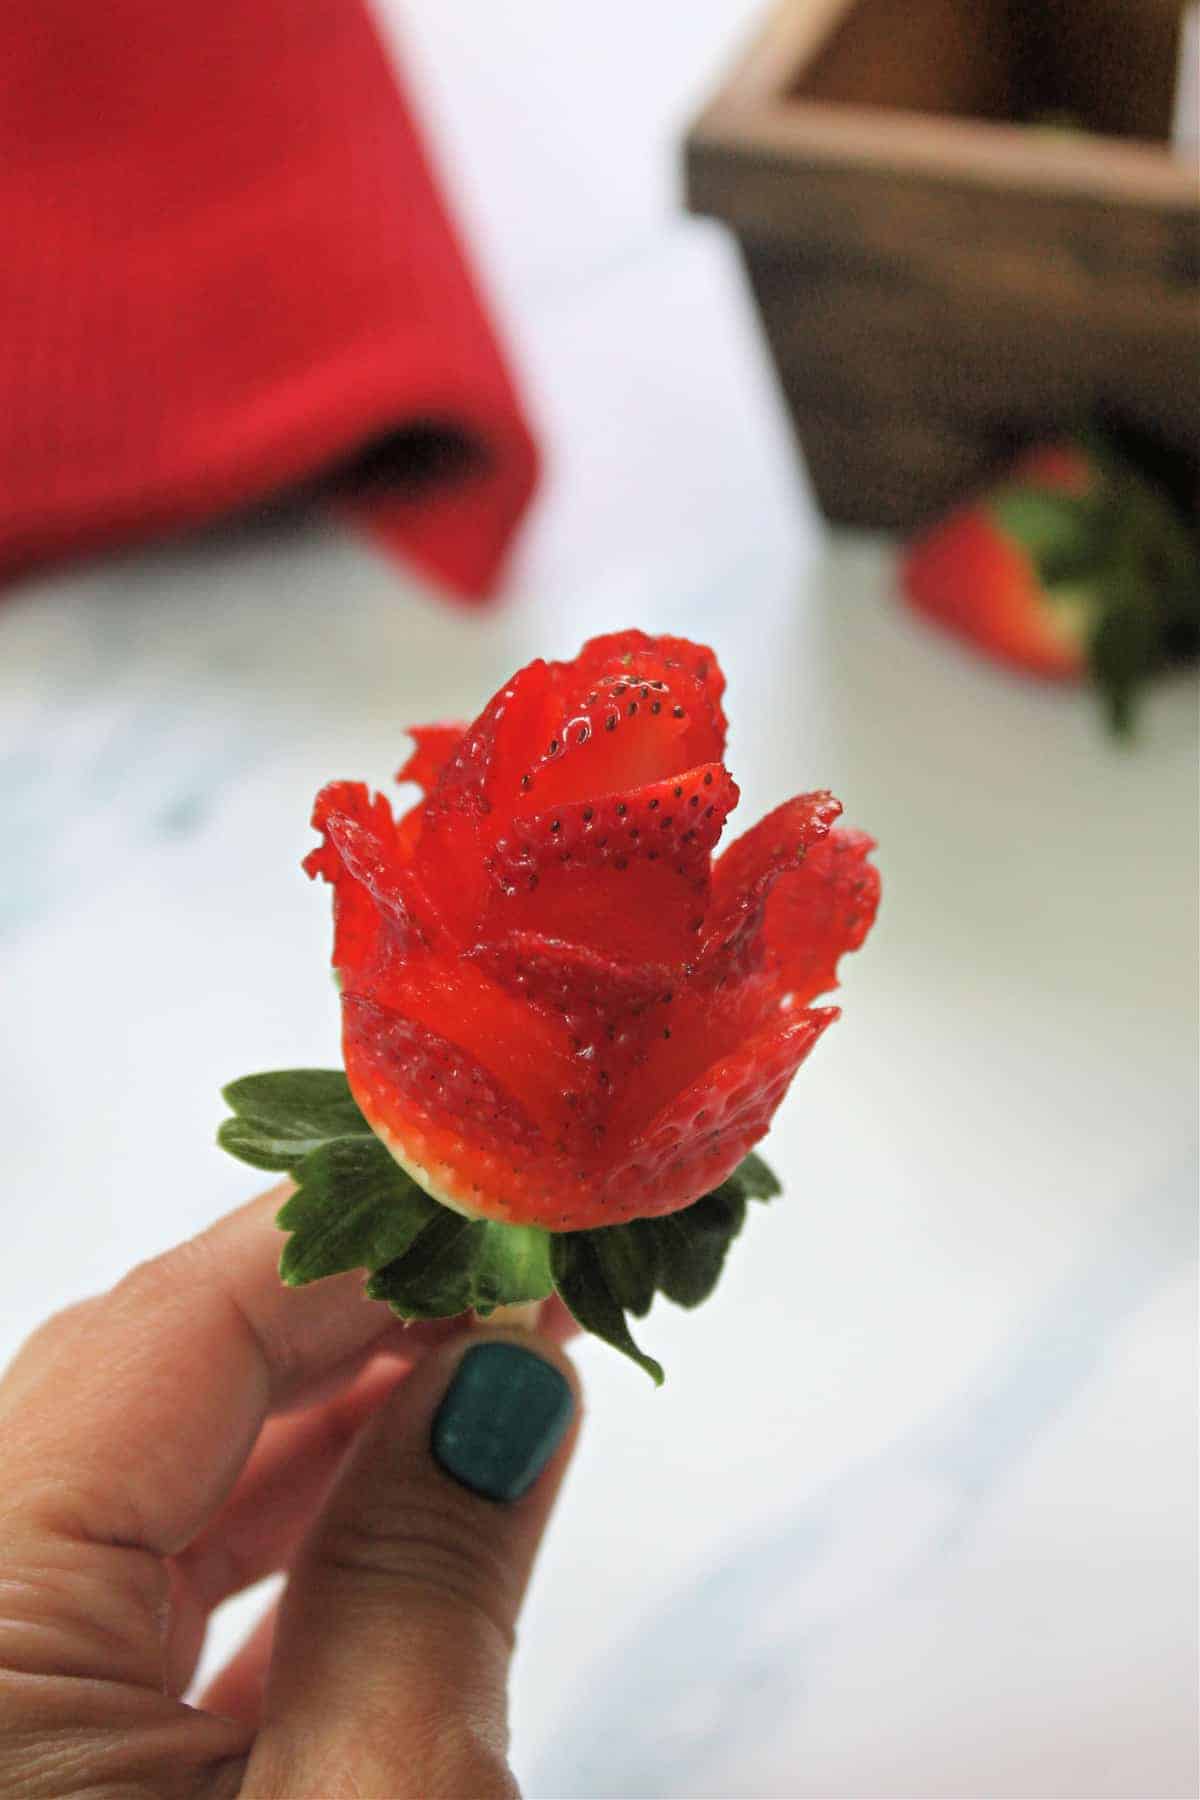
That's it! It's incredible how beautiful these look with very little effort or skill! Practice makes perfect, and the more you make, the faster you'll get. I can now make strawberry roses in under a minute each! If you're more of a visual learner, check out my TikTok video where I give a step-by-step narrated tutorial!
How Long Do Strawberries Last Once Cut?
Once cut, these strawberries will only last 2-3 days as the inside is exposed to oxygen, making them more susceptible to going bad. To store cut roses, carefully place them on a paper towel in an airtight container or zip-top plastic bag until ready to use.
Ways to Use
Once you have your finished "roses", there are endless way to showcase them!
- Use on top of cakes, cupcakes or desserts like mousses and puddings.
- Place in a champagne flute or as a finishing touch to embellish cocktails.
- Add them to a cheese or fruit platter or fondue board.
- Place them in a clean vase for immediate gifting!
I've also experimented with dipping them in chocolate and candying them tanghulu-style! These two videos I created on TikTok will show you how:
Recipes To Embellish with Strawberry Roses
Now that you've got this jaw-dropping technique down, you'll want to embellish all of your recipes with them! Here are a few berry recipes that could use some floral flair:
Strawberry Roses
Equipment
- Sharp paring knife
- Wooden skewer or popsicle stick
Materials
- 12 ripe strawberries
Instructions
- Start by inserting the wooden skewer into the leafy end of the strawberry.
- Beginning at the base of the strawberry, use your paring knife to make thin cuts straight down into the strawberry (not towards the center).
- Gently curl the slices towards you to create "petals." Repeat this all the way around the strawberry -- you should get 4-5 cuts depending on the size of the berry.
- When you complete the petals around the base, move up one level to create the next row of petals and repeat the same process - slice and lightly curl toward you. The petals look best if you make the cuts where two of the petals below it meet.
- Finally, move up another tier and repeat the process once again. When you reach the top of the strawberry, cut a few small slits and gently pull them apart.


Leave a Reply