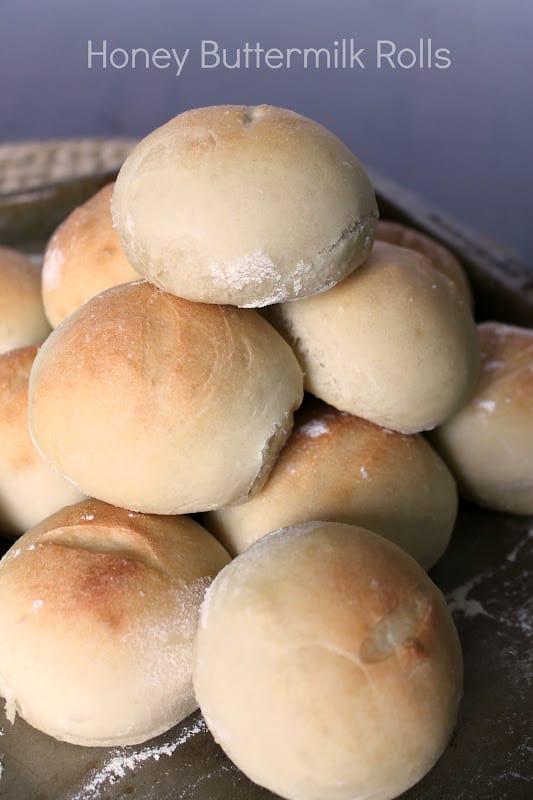
• Skip to primary navigation
  • Skip to main content
  • Skip to primary sidebar

The Kitchen Prep Blog

Easy Recipes with a Fresh Twist

  • Home
  • About Dianna
  • Recipe Index
  • Work With Me
    • Disclosure Policy
  • Contact
menu icon
go to homepage
subscribe
search icon
Homepage link
  • Home
  • Recipe Index
  • About Dianna
  • Work With Me
  • Contact
    • Facebook
    • Instagram
    • Pinterest
    • Twitter
  • ×

    Home » Bread

    Honey Buttermilk Rolls

    Published: Sep 12, 2012 · Modified: Jun 3, 2020 by thekitchenprep · This post may contain affiliate links ·

    Fall is just around the corner.

    It's true. All the signs are here: College football every Saturday, autumn scents at Bath & Body Works, and Pumpkin Spice Lattes at Starbucks. I always kid around and say that these are the only signs of Fall we Floridians get since the temperature barely falters.

    Though I always feel like I tend to want to cling with all my might to the remaining summer days {and ice cream recipes, cold refreshing cocktails, bright and beautiful strawberries...etc.}, I am actually feeling ready for the beginning of the busiest time of year.

    The start of a new season means that I've put away my summer cooking magazines, and have started to go through my fall collection in search of must-make recipes. My {insane} organization and labeling method worked so well at the start of the summer, that I decided to do the same thing all over again for fall.

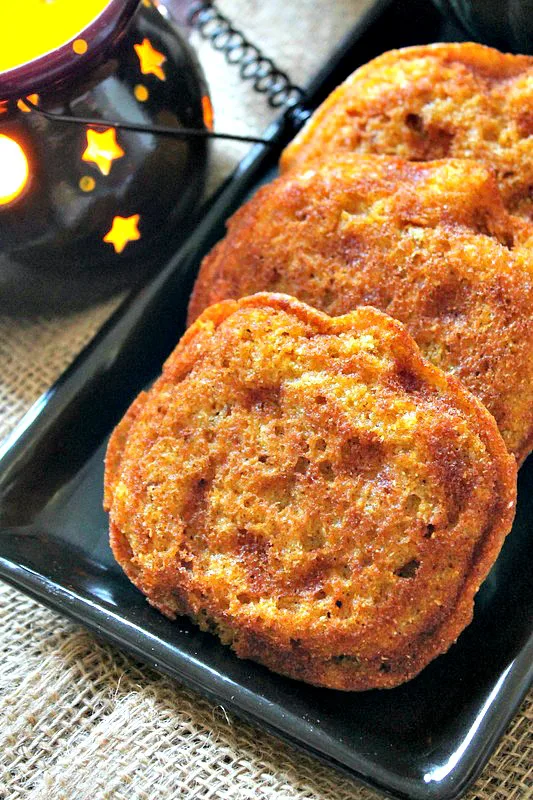
    After flipping through my first few Fall magazines, I already had a ton of recipes tagged. One in particular caught my eye and I decided that although the calendar has not officially proclaimed the beginning of autumn, I'd kick off the baking season by making these incredible looking Honey Buttermilk Rolls.

    I know bread is an undertaking that most people aren't all-too-willing to take on, but in my opinion, it's one food that's worth all the effort to have homemade.
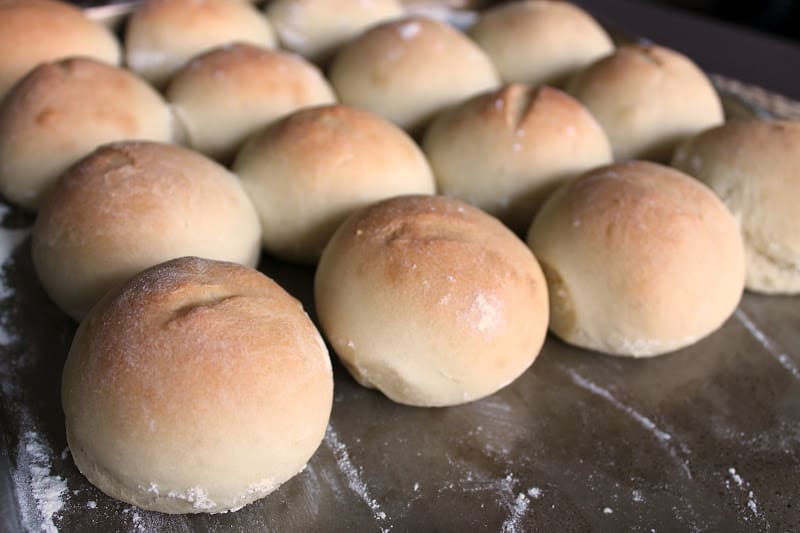
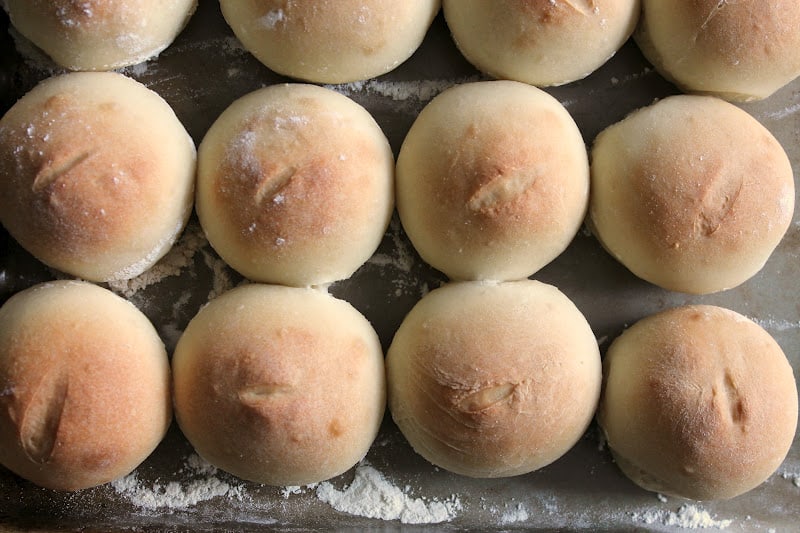
    These rolls didn't rise all that much after the first rise and I thought maybe the recipe {or the yeast I used} was a dud, but in the end they still baked up into lovely little rolls with a hint of sweetness... and they made the house smell unbelievable.

    In case you're up for the challenge and want to start off your Fall by making a batch of homemade rolls {start practicing now and impress the in-laws by Thanksgiving dinner! 😉 }, here's the recipe adapted from Taste of Home Magazine.

    In tomorrow's Tailgate Thursday post, you'll see how I put these babies to good use... stay tuned!

    Honey Buttermilk Rolls

    1 teaspoon sugar

    1 package dry yeast
    ½ cup warm water
    3 ¾ cups bread flour, divided {I used all-purpose which could be why they were more dense}
    ¾ cup buttermilk
    3 tablespoons honey
    2 tablespoons butter, melted
    1 teaspoon salt
    cooking spray
     
    In the bowl of a stand mixer {or regular bowl}, combine sugar, yeast, and warm water. Let sit for 10-15 minutes or until yeast is foamy. {If it doesn't, you will need new yeast.}
     
    Meanwhile, combine buttermilk and honey in a cup or bowl. Set aside.
     
    Add 2 cups of flour and mix until mostly smooth. Pour buttermilk mixture gradually into flour mixture until incorporated. Mix in melted butter.
     
    Mix in 1 ¼ cups more of flour and salt. Stir until it forms a soft dough.
     
    {If you have a stand mixer, you will want to use the dough hook at this point. If not, your hands will do the trick.}
     
    With a Stand Mixer: Using the dough hook attachment, knead dough, adding a few tablespoons of flour at a time about 6-7 minutes or until dough comes away from the sides of the bowl and is able to be touched without sticking to hands.
     
    By Hand: Turn out onto a floured board. Add a few tablespoons of flour at a time to dough until it is able to be handled without sticking. Knead dough until smooth and elastic, about 8 minutes, continuing to add flour as needed. {Dough will still be slightly sticky, but won't stick to hands.}

    Oil a large bowl. Place dough in bowl and allow to rise in a warm, dark place for about 45 minutes. {It should technically double in size, though mine didn't quite rise that much.}

    Punch down dough, and allow to rest for another 5 minutes.

    Meanwhile, prepare a baking sheet by lining with parchment or a silicone baking mat.

    Divide the dough into about 24 even pieces, rolling into a ball shape, and place on baking sheet. Cover with a clean, moistened kitchen towel and allow to rise another 20 minutes or so until they've about doubled in size. {Once again, they may not rise that much, but just go with it.}

    Preheat oven to 350. Remove kitchen towel and, if desired, score the top of each roll with a sharp knife. Bake for 16-18 minutes or until the tops are slightly golden brown. {You may want to rotate to ensure even baking.}

    Remove from oven and cool on a wire rack, or serve warm with butter.

    « Chocolate, Caramel, Marshmallow, Whiskey & Bacon Bark
    Tailgate Thursday: Tennessee Edition! »

    Reader Interactions

    Comments

    1. Andrew Piller says

      September 13, 2012 at 10:58 am

      Wow..I like sweets. Thanks for sharing this food item. I know more sweet is not good for health.

      Reply
    2. chineka says

      September 14, 2012 at 2:54 am

      These sound great. I usually bursh a honey mixture on top of the rolls before I start baking them. Like you I love the fall scents of bath and body works and the pumpkin spice lattes at Starbucks. 😎

      Reply
    3. The Kitchen Prep says

      September 14, 2012 at 12:00 pm

      Chineka - Sounds great! I thought about making a honey-butter mixture to put on top, but forgot about it. Happy Fall! 🙂

      Reply
    4. Hannah Lewis says

      October 06, 2015 at 5:25 pm

      Thanks for sharing, I have this rising as I type. ... thinking about brushing tops with a buttermilk honey mixture not sure if that would work... hope they turn out!

      Reply
    5. thekitchenprep says

      October 06, 2015 at 7:01 pm

      @Hannah - How great! I don't see why you shouldn't brush the tops -- my only concern would be that the honey would make the tops burn from the high sugar content, so keep an eye on them if you do. Hope you enjoy them!

      Reply
      • Hannah Lewis says

        October 06, 2015 at 8:41 pm

        Came out great, no burning except the edges on a few bottoms. :)...

        Reply

    Leave a Reply Cancel reply

    Your email address will not be published. Required fields are marked *

    Recipe Rating


    Primary Sidebar

    Hi! I'm Dianna. I used to think cooking had to be complicated to be good, so I never considered it "my thing." Now I know that's far from true, and my mission is to create & share easy, mouthwatering recipes - from weeknight dinners to simple bites for entertaining - that anyone can make! Join me in my South Florida kitchen and let's get cooking!

    More about me →

    Popular

    • Fork and knife cutting into a stuffed cubanelle pepper.
      Stuffed Italian-Style Cubanelle Peppers
    • Benedictine Spread for Kentucky Derby in a white bowl with a piece of pumpernickel toast in the foreground slathered with spread.
      Benedictine Spread - A Derby Classic
    • Close up of Italian Easter Cookies on a light blue platter.
      Italian Love Knot Cookies
    • A large skillet filled with Creamy Mushroom & Chicken Sausage Florentine Pasta with a yellow and white striped dish towel underneath.
      Creamy Mushroom & Chicken Sausage Florentine Pasta

    As Seen In

    Footer

    ↑ back to top

    About

    • Privacy Policy
    • Disclosure Policy

    Subscribe

    • Sign Up! and get recipes delivered to your inbox.

    Contact

    • Contact
    • Work with Me

    Copyright © 2023 · The Kitchen Prep ·